
Thick & Chewy Bakery-Style Cinnamon Rolls
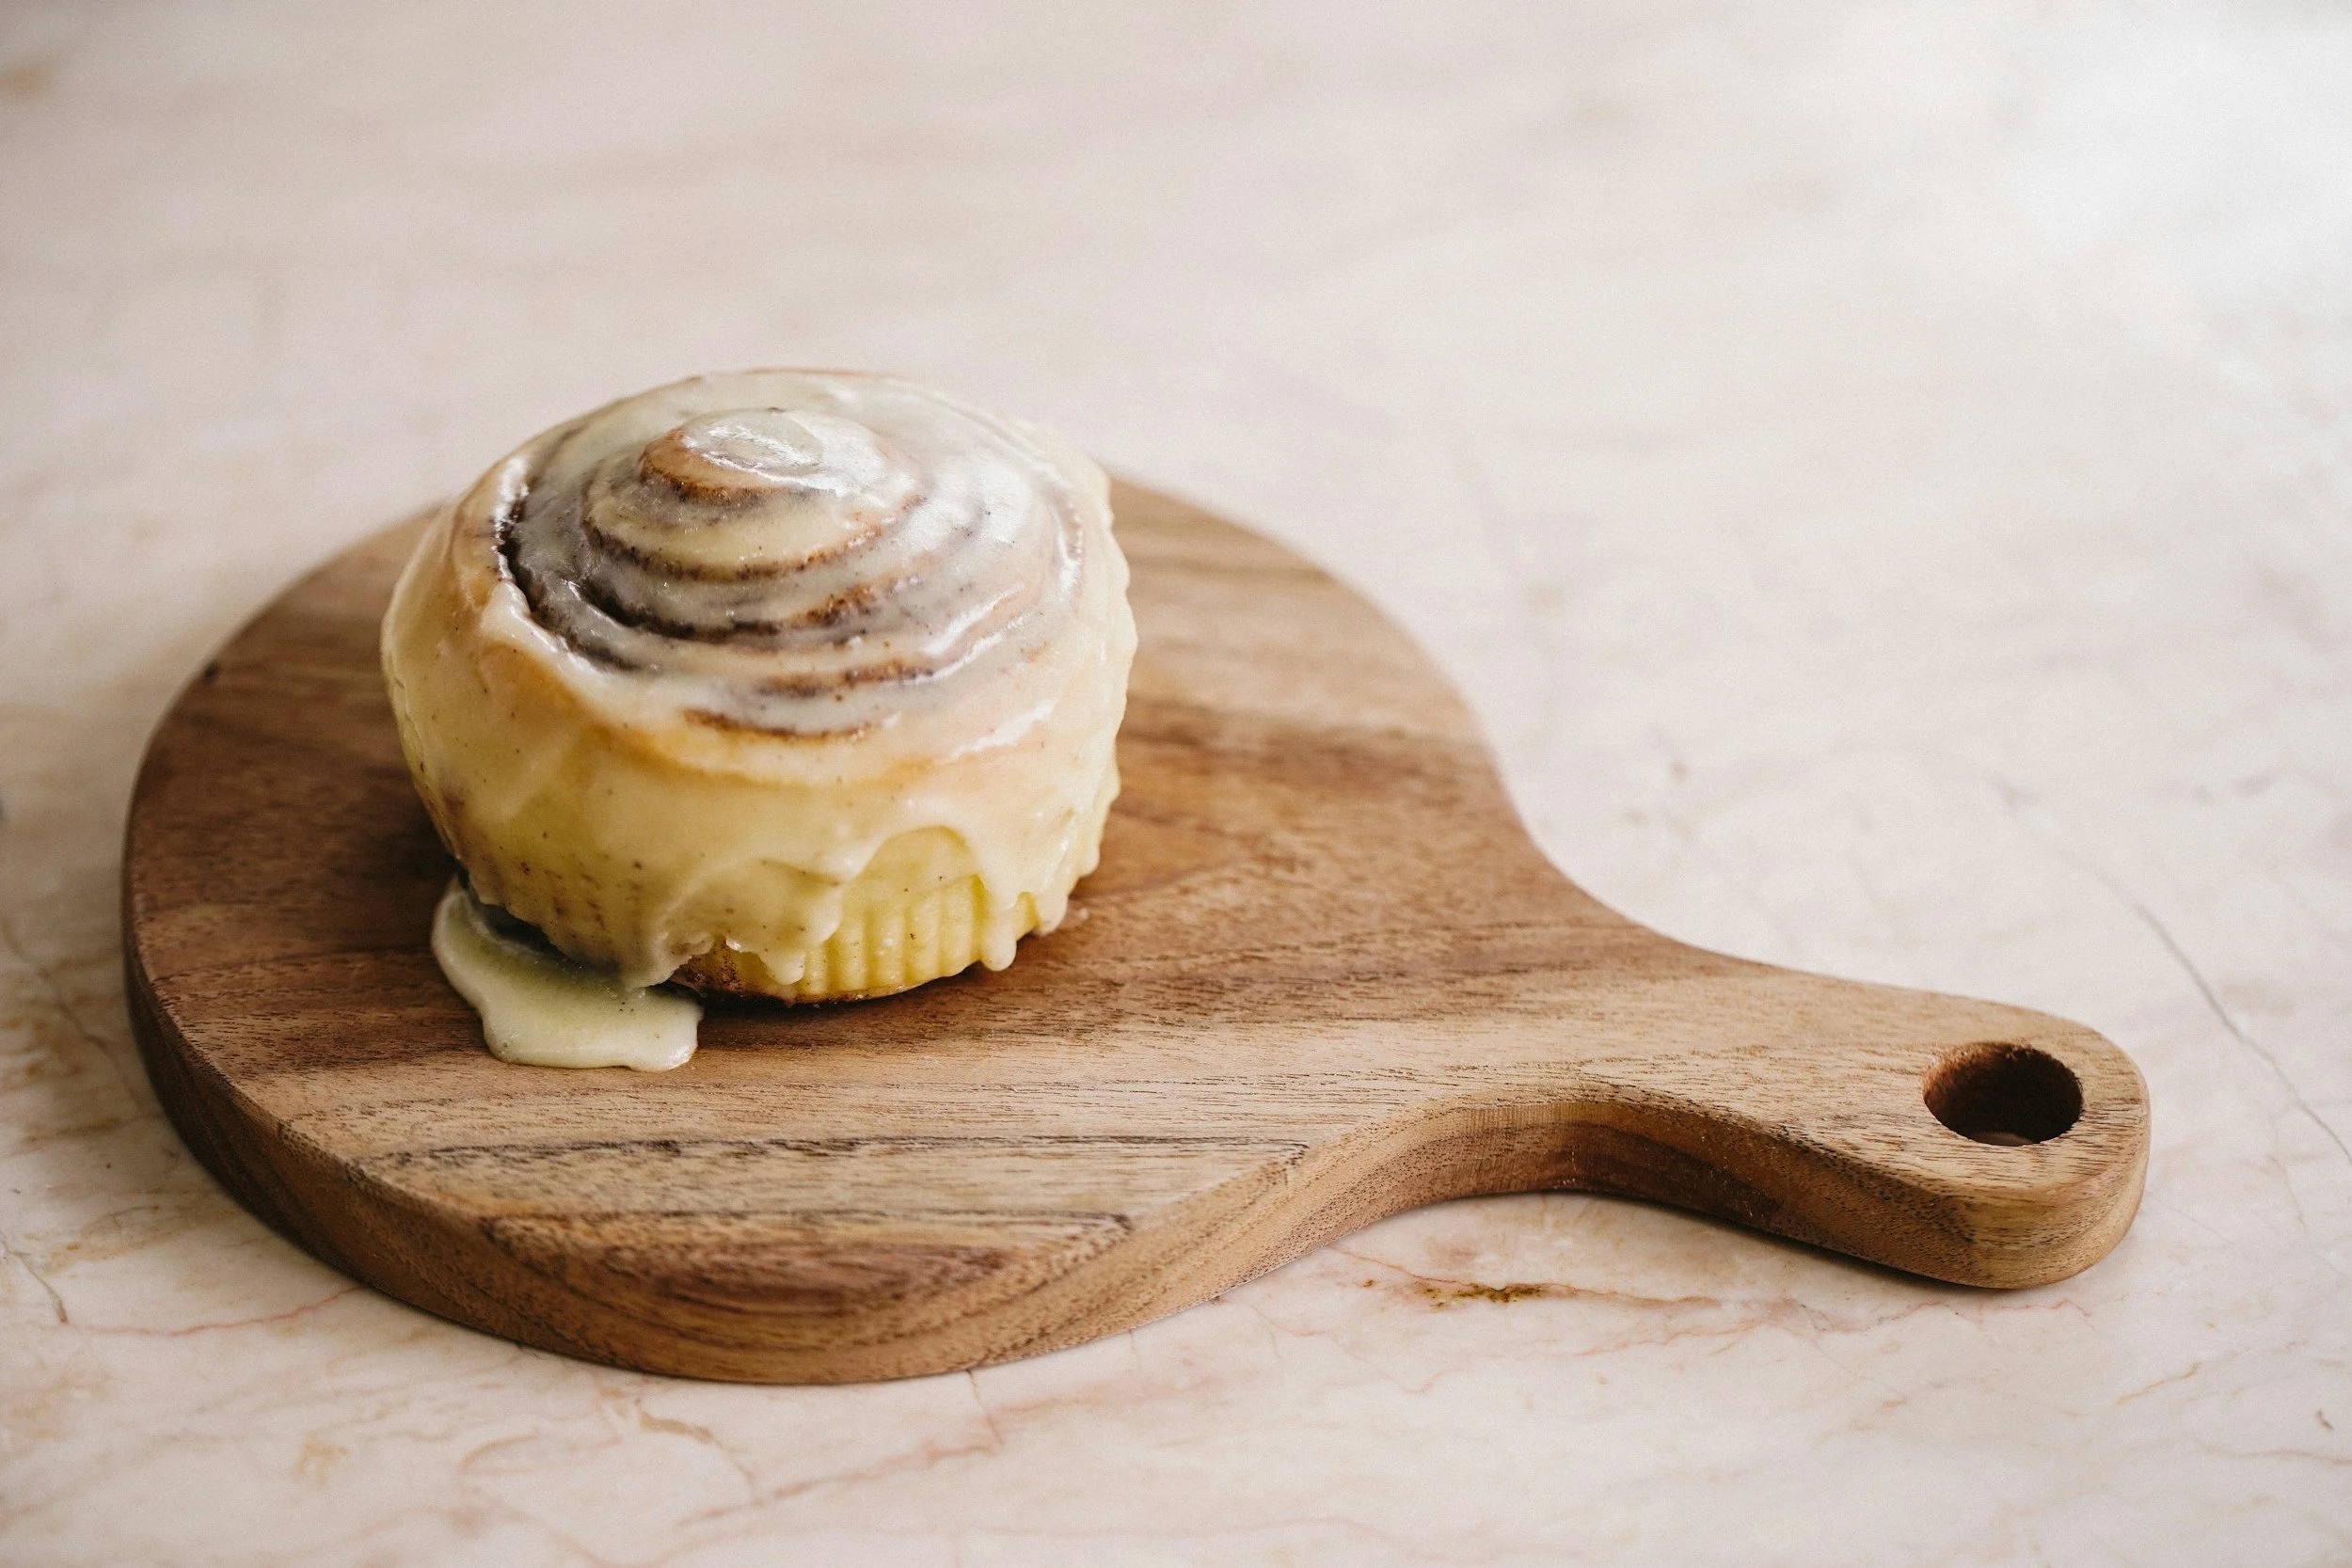
Loaded with Cinnamon-Brown Sugar Filling, Heavy Cream & Vanilla Cream Cheese Icing
There are cinnamon rolls that are light, fluffy and almost bread-like—and then there are cinnamon rolls that are rich, substantial, gooey and unapologetically decadent.
These are the second kind.
My ideal cinnamon roll is thick and tall, with a soft but pleasantly chewy crumb and layer after layer of buttery cinnamon-brown sugar filling. I want enough structure that I can actually pull apart those beautiful spirals, but I don't want anything remotely dry or tough.
I also want plenty of filling. There should be cinnamon and brown sugar in virtually every bite, with a slightly gooey center and buttery, caramelized filling collecting around the bottom of the rolls.
And just before these go into the oven, we're going to do something that takes an already wonderful cinnamon roll to another level:
We're pouring warm heavy cream over and around the fully proofed rolls.
As the rolls bake, that cream combines with the butter, brown sugar and cinnamon escaping from the spirals and creates an almost caramel-like sauce in the bottom of the pan. At the same time, it helps keep the rolls extraordinarily moist.
Then, while they're still warm, we're covering them with a thick vanilla cream cheese icing.
These are not delicate little breakfast rolls.
These are big, thick, chewy, gooey bakery-style cinnamon rolls.
Why I Want a Cinnamon Roll to Have Some Chew
"Soft" and "chewy" aren't opposites.
A great cinnamon roll can be incredibly tender while still having enough gluten structure to give you that satisfying pull when you tear into it.
That's exactly what we're after.
This dough is enriched with whole milk, butter, eggs and sugar. Those ingredients make the finished bread tender and rich, but fat and sugar also interfere somewhat with gluten development.
That's why I like using bread flour for these rolls.
Bread flour contains more protein than typical all-purpose flour, giving us the potential to develop a stronger gluten network. That structure helps the dough hold all of our butter, sugar and cinnamon while also supporting tall, substantial rolls.
The goal isn't toughness.
The goal is tenderness with structure.
Thick Rolls Make Better Rolls
There is another reason I make these cinnamon rolls substantial.
A thin roll has more exposed surface area relative to its interior, so it dries relatively quickly.
A thick cinnamon roll protects its center.
While the exterior becomes beautifully golden, the interior remains soft and moist, giving us that wonderful contrast between the slightly caramelized outside and the tender, gooey center.
That's why we're making nine large rolls in a 9 × 13-inch pan rather than a dozen smaller ones.
Recipe
Thick & Chewy Bakery-Style Cinnamon Rolls
Yield: 9 large cinnamon rolls
Pan: 9 × 13-inch metal baking pan
Proofing temperature: 78–80°F / 26–27°C
Proofing humidity: approximately 75–80% RH
Oven temperature: 350°F / 177°C
Finished internal temperature: approximately 190°F in the dough portion of the center roll
Dough
500 g bread flour
240 g whole milk, lukewarm
7 g instant yeast
75 g granulated sugar
2 large eggs, room temperature
75 g unsalted butter, very soft
8 g fine salt
1 teaspoon vanilla extract
Cinnamon-Brown Sugar Filling
115 g unsalted butter, very soft
200 g dark brown sugar
18–20 g ground cinnamon
15 g all-purpose flour
2 g fine salt
1 teaspoon vanilla extract
Before Baking
120 g heavy cream, gently warmed
Vanilla Cream Cheese Icing
170 g full-fat block cream cheese, softened
60 g unsalted butter, softened
180 g powdered sugar
1 teaspoon vanilla extract
Pinch of salt
15–30 g heavy cream, as needed
Step 1: Make the Dough
Combine the lukewarm milk, instant yeast, sugar, eggs and vanilla in the bowl of a stand mixer.
Add the bread flour and salt.
Using the dough hook, mix on low speed until everything comes together into a shaggy dough. Continue mixing for approximately 3–4 minutes.
Now begin adding the very soft butter gradually rather than dumping it all in at once.
Don't be alarmed if the dough temporarily looks slippery or begins separating as the butter is incorporated. Keep mixing. The developing gluten network will eventually absorb the butter and the dough will come back together.
Continue kneading on medium-low speed for approximately 7–10 minutes, or until the dough becomes smooth, elastic and slightly tacky.
Notice I said tacky—not dry.
One of the biggest mistakes in cinnamon-roll making is continuing to add flour until the dough no longer sticks to anything.
That makes the dough easier to handle.
It also makes dry cinnamon rolls.
Step 2: Check the Gluten
Before you stop kneading, check the gluten development.
Pull off a small piece of dough and gently stretch it between your fingers.
You should be able to stretch the dough quite thin before it tears—thin enough that light can begin to pass through it.
This is the windowpane test.
Why does it matter?
Yeast produces carbon dioxide during fermentation. We need a sufficiently developed gluten network to capture those gases and allow our cinnamon rolls to expand upward rather than simply spreading outward.
Good gluten development also contributes to that wonderful slightly chewy texture we're after.
Step 3: First Fermentation
Shape the dough into a ball and place it in a lightly greased bowl.
If you have a proofing box, set it to approximately:
78–80°F / 26–27°C with approximately 75–80% relative humidity.
This is an excellent environment for an enriched yeast dough.
The warmth encourages yeast activity without rushing fermentation, while the humidity prevents the exposed surface of the dough from drying out.
If you're using a properly humidified proofing box, you generally don't need to tightly cover the dough.
If you're proofing at room temperature, cover the bowl so the surface doesn't develop a skin.
Allow the dough to ferment until approximately doubled in volume.
This will often take around 60–90 minutes, but here's an important lesson:
Yeast doesn't own a watch.
Temperature, dough temperature, yeast activity and ingredient temperatures all affect fermentation.
Watch the dough—not just the clock.
Why I Don't Proof These at 85–90°F
You'll sometimes see very warm proofing temperatures recommended for cinnamon rolls because higher temperatures make yeast work faster.
But faster isn't necessarily better.
This is an enriched dough containing butter, eggs, milk and sugar. At increasingly warm temperatures, the butter becomes softer and the dough can become greasy. Later, once the cinnamon filling has been added, excessive warmth can also encourage that filling to soften and begin migrating out of the spirals.
I would rather give the yeast a little more time at 78–80°F.
We aren't trying to make the rolls rise as fast as possible.
We're trying to make them as good as possible.
Step 4: Make the Cinnamon Filling
Combine the softened butter, dark brown sugar, cinnamon, flour, salt and vanilla.
Mix everything together until you have a thick, spreadable cinnamon paste.
I strongly prefer this method to brushing the dough with melted butter and sprinkling cinnamon sugar over it.
A paste distributes the filling more evenly and helps keep it where we want it:
inside the cinnamon roll.
Why Is There Flour in the Filling?
As cinnamon rolls bake, butter melts long before the dough structure completely sets.
Without anything to absorb some of that liquid, the butter and dissolved sugar can simply run out of the spirals and collect in the bottom of the pan.
A small amount of flour helps bind the melted butter and sugar.
We're not adding enough flour to make the filling dry.
We're simply giving the filling enough body to encourage it to stay between those beautiful layers of dough.
Step 5: Roll the Dough
Turn the fermented dough onto a very lightly floured work surface and gently deflate it.
Roll it into approximately a:
14 × 18-inch rectangle.
Try to maintain even thickness throughout the rectangle and square up the corners as you work.
An evenly shaped rectangle gives us evenly sized cinnamon rolls.
Step 6: Don't Be Stingy with the Filling
Spread the cinnamon filling evenly over the dough, leaving approximately ½ inch uncovered along the far long edge.
Take the filling almost completely to the remaining edges.
This isn't the time for a microscopic dusting of cinnamon.
One of the defining characteristics of these rolls is their generous filling-to-dough ratio.
I want to see cinnamon filling between every spiral.
Step 7: Roll It Snugly
Beginning with the long edge closest to you, begin rolling the dough into a cylinder.
Keep gentle tension on the dough as you roll.
You want the cylinder snug but not strangled.
Rolling too loosely can create large empty spaces between the spirals.
Rolling excessively tightly can compress the dough and restrict its ability to expand during proofing.
We're looking for beautifully defined, evenly spaced spirals.
Step 8: Cut Nine Thick Rolls
Trim the uneven ends if necessary and divide the cylinder into 9 large rolls.
Dental floss is wonderful for this because it cuts through the dough without crushing those spirals.
A very sharp serrated knife also works.
Arrange the rolls in a lightly buttered 9 × 13-inch metal pan in three rows of three.
Now they're ready for their final proof.
And this is where learning to read the dough becomes particularly important.
Step 9: The Final Proof
Return the pan to the proofing box.
Again, I recommend:
78–80°F / 26–27°C
with approximately:
75–80% relative humidity.
That humidity keeps the exposed dough supple while the rolls expand.
If you're using a humidified proofing box, you generally don't need plastic wrap over the pan.
Allow the rolls to proof until they're noticeably larger, beautifully puffy and beginning to touch one another.
This may take approximately 45–75 minutes, but the clock is only a guideline.
Instead, we're going to look at the rolls.
And we're going to give them a little shake.
The Cinnamon Roll Wobble Test
If you've ever proofed croissants, you may already be familiar with the jiggle or wobble test.
A properly proofed croissant has that unmistakable delicate jiggle when the tray is gently moved.
We can use a similar visual cue with cinnamon rolls.
But there's an important difference.
A cinnamon roll isn't laminated dough, so don't expect the dramatic gelatinous wobble of a fully proofed croissant.
Instead, gently move the cinnamon-roll pan from side to side.
Watch the rolls.
Underproofed cinnamon rolls look tight and stiff.
They don't move very much when the pan moves. The spirals still look compressed and the dough feels firm.
They're telling you they need more time.
Properly proofed cinnamon rolls look plump, relaxed and soft.
When you gently move the pan, the rolls should have a soft little wobble.
They won't slosh around.
They won't jiggle like Jell-O.
But they should no longer look rigid.
The rolls should appear inflated, the spirals should have visibly expanded and neighboring rolls should be beginning to touch.
That's what we're looking for.
Overproofed rolls can look fragile.
If they're extremely swollen, wrinkling, deflating or look as though the slightest movement might collapse them, they've probably gone too far.
So rather than teaching:
"Proof the cinnamon rolls for exactly 60 minutes,"
I much prefer:
Proof by the dough, not by the clock.
Look for puffiness + expansion + softened spirals + a gentle wobble when the pan is moved.
That's your signal.
Step 10: Now Comes the Heavy Cream
Once the rolls are fully proofed, remove them from the proofing box.
Do not add the heavy cream before proofing.
Gently warm 120 g of heavy cream. We want it pleasantly warm—not hot and certainly not boiling.
Slowly pour the cream over and around the rolls, allowing it to run into the spaces between them.
Then put the pan directly into the preheated oven.
The sequence is:
PROOF → WOBBLE TEST → WARM HEAVY CREAM → OVEN.
Why Pour Heavy Cream Over Cinnamon Rolls?
This sounds excessive.
It is.
And that's exactly why it's so wonderful.
As the rolls bake, the butter in the cinnamon filling melts and the brown sugar begins dissolving.
Meanwhile, the heavy cream moves into the spaces surrounding the rolls and mingles with that escaping butter, cinnamon and brown sugar.
The result is something remarkably close to a cinnamon-caramel sauce being created directly in the baking pan.
The cream also provides additional moisture during baking, helping keep the exterior surfaces of the rolls exceptionally tender.
But don't assume that if 120 grams is good, 240 grams must be twice as good.
It's not.
Too much cream can leave the bottoms wet and interfere with proper baking.
For nine large rolls, about 120 grams is plenty.
Step 11: Bake
Bake the cinnamon rolls at:
350°F / 177°C for approximately 25–32 minutes.
Look for beautifully golden tops.
If they're browning too quickly before the centers are finished, loosely tent the pan with foil and continue baking.
For consistency—especially when teaching students—I recommend checking the center roll with an instant-read thermometer.
Insert the thermometer into an actual section of dough rather than directly into the molten cinnamon filling.
We're looking for approximately:
190°F / 88°C.
That gives us baked dough without unnecessarily drying the rolls.
Step 12: Make the Vanilla Cream Cheese Icing
Beat the softened cream cheese and butter together until completely smooth.
Add the powdered sugar, vanilla and pinch of salt.
Beat until light and creamy.
Then add heavy cream gradually until you reach a thick but beautifully spreadable consistency.
This isn't supposed to be a transparent glaze.
I want icing.
Step 13: Ice Them While They're Warm
Let the cinnamon rolls rest for approximately 10–15 minutes after baking.
We don't want to put the cream cheese icing onto rolls that are screaming hot because it will completely liquefy.
But we don't want them completely cool either.
Spread the icing generously over the warm rolls.
The residual heat will soften it just enough that some of the icing begins creeping down into those cinnamon spirals while plenty remains on top.
Exactly where it belongs.
Why Dark Brown Sugar?
I particularly like dark brown sugar in cinnamon rolls because of its higher molasses content.
Molasses brings moisture, acidity and a deeper caramel flavor that pairs beautifully with cinnamon and butter.
Once that dark brown sugar encounters butter and heavy cream in the oven, the flavor becomes almost butterscotch-like.
Granulated sugar can make a cinnamon filling.
Dark brown sugar makes a luxurious cinnamon filling.
Make Them the Night Before
These rolls are excellent for overnight preparation.
Prepare the dough, complete the first fermentation, roll and fill it, cut the nine cinnamon rolls and arrange them in the baking pan.
Then cover the pan tightly and refrigerate it overnight before completing the final proof.
The following morning, remove the rolls from the refrigerator and place them in the 78–80°F proofing box at approximately 75–80% humidity.
Because the dough is cold, final proofing may take longer.
Again, don't rely on the clock.
Wait until they're beautifully puffy and beginning to touch.
Then gently shake the pan.
Look for that soft little wobble.
Once it's there:
warm cream → pour → bake.
Do not pour the heavy cream over the rolls before refrigerating them overnight.
Troubleshooting Cinnamon Rolls
My Rolls Are Dry
The most likely culprits are too much flour or too much baking.
Don't keep adding flour simply because enriched dough feels slightly tacky.
And don't continue baking because you think darker must mean better.
Check the internal temperature.
My Rolls Are Dense
Look at two things first:
Gluten development and proofing.
If the dough wasn't adequately kneaded, it may not have developed enough gluten structure to capture fermentation gases.
If the rolls were underproofed, they may be tight and dense.
Remember the wobble test.
If the rolls still look rigid and barely move when the pan is gently shaken, they probably need more time.
My Filling Leaked Out
A little leakage is completely normal—and delicious.
Excessive leakage may mean the butter was melted rather than softened, the filling wasn't mixed into a paste, the cylinder was rolled too loosely or the proofing environment was excessively warm.
My Spirals Have Huge Gaps
The dough cylinder was probably rolled too loosely.
Maintain gentle, consistent tension while rolling.
My Rolls Rose and Then Collapsed
Overproofing is a likely culprit.
The yeast can inflate the dough beyond the point where its gluten structure can support it.
If the rolls are extremely fragile, overly swollen or beginning to wrinkle or deflate, they've gone beyond that ideal proof.
My Bottoms Are Soggy
Too much heavy cream or insufficient baking are the most likely causes.
Remember:
We're enriching the rolls with cream.
We're not poaching them in it.
My Cream Cheese Icing Is Runny
The cream cheese or butter may have been too warm, too much heavy cream may have been added, or the icing may have gone onto rolls that were still extremely hot.
Let the rolls cool for approximately 10–15 minutes before icing.
The Most Important Lesson: Learn to Read the Dough
One of the best things we can teach when working with yeast dough isn't a particular number of minutes.
It's observation.
Recipes give us times because we need guidelines.
But yeast fermentation changes with dough temperature, ingredient temperature, room temperature, yeast activity and even the richness of the dough itself.
So I'm not just watching the clock.
I'm watching my cinnamon rolls.
Are they larger?
Are they puffy?
Have those tight spirals relaxed and expanded?
Are neighboring rolls beginning to touch?
And when I gently move the pan...
Do they give me that soft little wobble?
When the answer is yes, they're telling me they're ready.
Then it's time for warm heavy cream and a hot oven.
The Cinnamon Roll I'm After
I don't want a cinnamon roll that's simply sweet bread with a little cinnamon running through it.
I want layers.
I want enough gluten development to give the dough a satisfying chew while milk, eggs and butter keep it tender.
I want thick rolls with soft centers.
I want dark brown sugar and cinnamon in virtually every bite.
I want the heavy cream to mingle with the butter and brown sugar and create that sticky cinnamon-caramel goodness around the bottom of the rolls.
And finally, I want a ridiculous amount of vanilla cream cheese icing slowly melting into the warm spirals.
Thick dough.
Lots of filling.
Beautiful proof.
A gentle wobble.
Warm heavy cream.
Cream cheese icing.
Now that's a cinnamon roll.