
The Chiffon Cake Method: Understanding the Science Behind a Light, Tender Cake
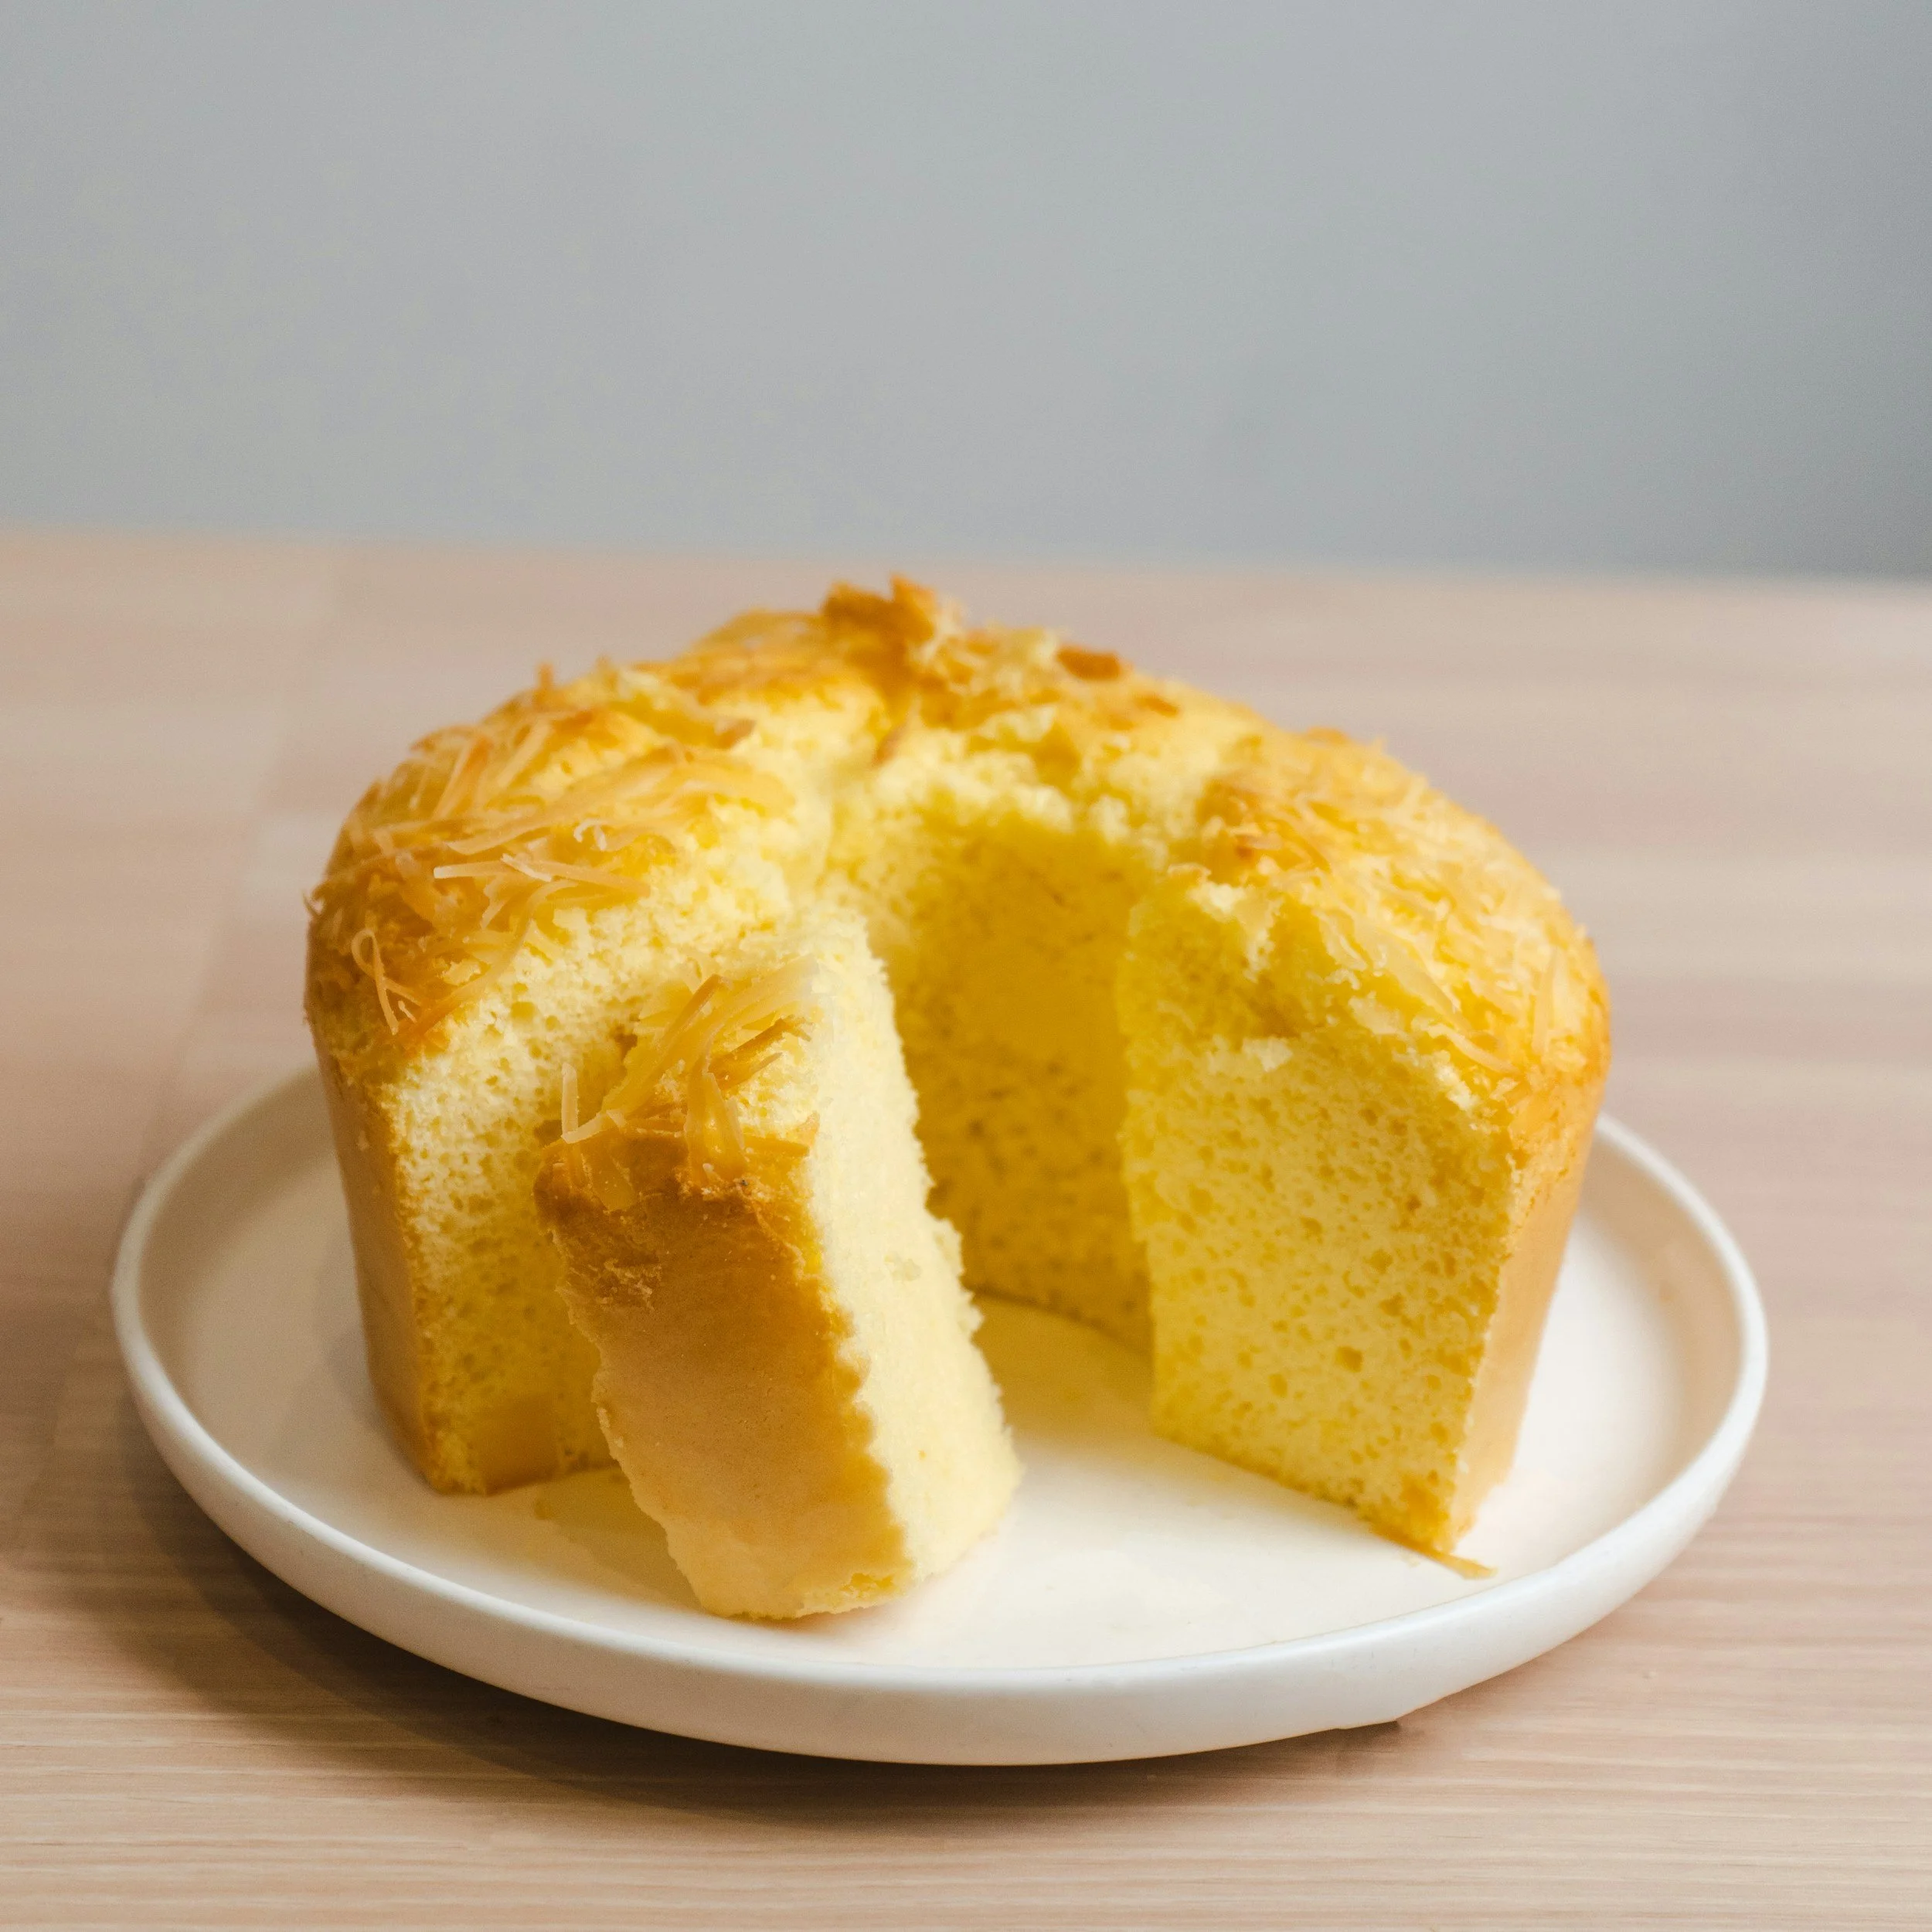
Chiffon cake is one of those cakes that seems almost magical when it is done correctly. It has the height and airy texture we associate with a foam cake, but it is considerably moister and more tender than an angel food cake.
The reason is that chiffon cake combines two different cake-making principles in one formula.
It contains an oil-and-egg-yolk batter for moisture, richness, and tenderness, while separately whipped egg whites provide much of the aeration that gives the cake its characteristic light texture.
Understanding that separation is the key to understanding the chiffon method.
There are essentially two mixtures prepared separately:
The base batter: flour and other dry ingredients combined with egg yolks, oil, liquid, and flavorings.
The egg-white foam: egg whites whipped with sugar and usually an acid such as cream of tartar.
The important point is that the entire flour-based batter is completed before the egg-white foam is folded into it.
You do not fold the egg whites into the yolk-and-oil mixture and then add flour afterward.
Once that beautiful foam has been created, we want to preserve as much of it as possible.
The basic chiffon sequence is:
Prepare the pans → Combine the dry ingredients → Combine the yolks, oil, and liquid → Add the yolk/oil mixture to the dry ingredients → Mix the complete base batter → Prepare the egg-white foam → Lighten the base batter with some of the foam → Fold in the remaining foam → Pan → Bake → Cool properly → Unmold
Let's look at why each step matters.
Preparing the Pans
Chiffon cake is traditionally baked in an ungreased aluminum tube pan, but it can also be successfully baked in ungreased aluminum layer cake pans.
In our baking classes, we commonly use aluminum layer cake pans for chiffon cakes, particularly when the cake will ultimately be filled, layered, and finished as a traditional layer cake.
Whichever style of pan is being used, one principle is especially important:
Do not grease the sides of the pan unless a particular formula specifically instructs otherwise.
This seems strange to students who have been taught to grease cake pans, but chiffon batter benefits from being able to grip the aluminum surface as it rises.
The batter essentially climbs the sides of the pan.
Greased or heavily nonstick sides can interfere with that process.
A traditional tube pan has another advantage: the center tube allows heat to reach the middle of a relatively deep cake, helping the cake bake and set evenly.
When using aluminum layer cake pans, the batter is divided among shallower pans, so heat does not have as far to travel to reach the center.
This makes aluminum layer pans an excellent option when chiffon cake will be used as layers for a finished cake.
Step One: Combine the Dry Ingredients
Begin by combining the flour, the portion of sugar designated for the base batter, baking powder if called for in the formula, and salt.
Whisk or sift the ingredients as directed by your recipe.
The goal is to evenly distribute the ingredients especially the leavening and eliminate lumps before liquid is introduced.
And this is important:
All of the flour is going into the base batter now.
We will not be adding flour after the egg-white foam is introduced.
Step Two: Combine the Egg Yolks, Oil, and Liquid
In a separate bowl, combine the egg yolks, neutral oil, liquid, and flavorings.
Depending upon the chiffon formula, the liquid might be water, milk, fruit juice, coffee, or another flavored liquid.
Flavorings might include vanilla, citrus zest, extracts, spices, or other ingredients.
Mix these ingredients together until they are thoroughly combined.
At the culinary school we use a pitcher and a whisk to combine the wet ingrdients.
Unlike a traditional butter cake, there is no creaming step in chiffon cake.
The oil is not responsible for incorporating air into the batter.
That job will largely belong to our egg-white foam.
So why use oil?
Oil contributes moisture and tenderness without becoming firm when chilled. This is one reason chiffon cake stays exceptionally soft and moist, even after refrigeration.
The egg yolks contribute additional fat, flavor, color, protein, and natural emulsifiers.
Step Three: Add the Egg-and-Oil Mixture to the Flour Mixture
Now we bring the base batter together.
Add the egg-yolk, oil, and liquid mixture to the dry ingredients.
Mix until the flour is completely hydrated and the batter is smooth and homogeneous.
There should be no pockets of dry flour remaining.
At this point, we have completed our entire base batter.
This sequencing is important enough to repeat:
Dry ingredients first.
Egg yolks + oil + liquid are combined separately.
The yolk/oil mixture is added to the dry ingredients.
The complete flour-based batter is mixed.
Only then do we incorporate the egg-white foam.
This allows us to properly hydrate the flour and produce a smooth base batter without having to worry about destroying our carefully whipped egg whites.
Once the egg-white foam enters the batter, our mixing becomes much more controlled and gentler.
Step Four: Prepare the Egg-White Foam
Now we prepare the second major component of chiffon cake: the egg-white foam.
The mixing bowl and whisk must be completely clean and free from grease.
Even a small amount of fat, including egg yolk, can interfere with the egg whites' ability to develop a strong foam.
I will wipe out my bowl and wipe down my whisk attachment and any spatulas I am using with white vinegar and a clean towel to be sure my utensils are grease free.
Begin whipping the egg whites on medium speed
As the whisk moves through the whites, it mechanically introduces air. Egg-white proteins begin unfolding and surrounding millions of tiny air bubbles.
As whipping continues, the mixture changes from liquid to foamy and eventually develops into a structured foam.
Step Five: Stabilize the Foam
Once the whites have become foamy, cream of tartar or another acid specified in the recipe may be added.
The acid helps stabilize the egg-white proteins and creates a foam that is strong but still flexible.
This flexibility becomes extremely important later because we still have to fold this foam into our heavier base batter.
Step Six: Gradually Add the Sugar
Once the whites have developed some initial structure, gradually begin adding the portion of sugar designated for the meringue.
Do not dump all of the sugar into the egg whites at once.
Sugar performs two somewhat competing functions.
It helps stabilize the finished foam, but it also slows the development of the foam.
Allowing the egg whites to begin developing before gradually introducing the sugar gives us good volume along with good stability.
Step Seven: Know When to Stop Whipping
For chiffon cake, the egg whites should generally be whipped to approximately medium-firm to firm peaks while remaining glossy and flexible.
When the whisk is lifted, the meringue should form a defined peak. The very tip may bend slightly rather than standing completely rigid. I think of the Dairy Queen curl.
The foam should look:
Smooth.
Glossy.
Fine-textured.
Moist.
Flexible.
It should not look dry, chunky, cottony, grainy, or curdled.
It can be tempting to think that whipping the egg whites extremely stiff will produce a taller cake.
It can actually have the opposite effect.
Overwhipped egg whites become dry and less flexible. Instead of blending easily into the batter, they break into clumps.
You then have to fold the batter more aggressively to eliminate those clumps.
And the more you have to manipulate the batter, the more air you lose.
The goal is not the stiffest possible foam. The goal is a strong, stable, flexible foam.
Step Eight: Lighten the Base Batter
We now have two completely finished mixtures:
Our flour, yolk, oil, and liquid base batter
and
Our whipped egg-white foam.
The base batter is considerably heavier than the foam.
If we simply dump all of the foam into that heavy batter and begin folding, we may have to work too hard to combine the two.
Instead, take approximately one-quarter to one-third of the egg-white foam and add it to the base batter.
Mix this first portion into the batter to lighten it.
This first addition is sometimes referred to as the sacrificial portion of the foam.
That name tells us something important.
We are not terribly concerned about preserving every air bubble in this first addition.
Its primary purpose is to reduce the density of the base batter so that it becomes closer in consistency to the remaining egg-white foam.
You can therefore incorporate this first portion somewhat more assertively.
Once the base batter has been lightened, we are ready for the delicate part.
Step Nine: Fold in the Remaining Egg-White Foam
Add the remaining egg-white foam to the lightened batter, preferably in one or two additions.
Now we fold.
Using a large rubber spatula, cut down through the center of the mixture, sweep across the bottom of the bowl, and bring the heavier batter upward and over the foam.
Rotate the bowl and repeat.
The goal is to completely combine the mixtures while preserving as much of the incorporated air as possible.
There is an important balance here.
Do not overfold.
Every unnecessary stroke destroys some of the air cells we worked to create.
But also:
Do not underfold.
Leaving pockets of unmixed egg-white foam can produce white streaks, large holes, tunnels, and an irregular crumb.
Continue folding until the batter is uniform in color and consistency and no visible streaks of egg white remain.
Then stop.
There is no additional vigorous mixing.
The batter is finished.
Step Ten: Pan the Batter
Immediately transfer the finished chiffon batter to your ungreased aluminum tube pan or ungreased aluminum layer cake pans, depending upon the application.
When making layer cakes, divide the batter evenly among the pans so that the layers bake at approximately the same rate. I like to weigh my batter in my layer cake pans for even layers.
Gently level the batter without aggressively working it.
Avoid repeatedly banging the pans on the counter. We have spent considerable effort creating and preserving those air cells, so we do not want to intentionally knock them out now.
Once panned, chiffon batter should go into the heated oven immediately rather than sitting on the bench.
What Happens in the Oven?
Understanding what happens during baking makes chiffon cake much easier to troubleshoot.
Chiffon cake rises through several mechanisms working together.
First, the air trapped inside the egg-white foam expands as it heats.
Second, moisture in the batter turns to steam and expands.
Third, if the formula contains baking powder, it releases carbon dioxide that contributes additional lift.
The cake can therefore expand dramatically.
But expansion alone does not make a successful cake.
That expanded structure has to become permanent.
As the temperature of the batter rises, egg proteins coagulate and starches absorb moisture, swell, and gelatinize.
Together, those proteins and starches create the structural framework surrounding the expanded air cells.
This explains one of the most common chiffon problems:
A chiffon cake can rise beautifully in the oven and still collapse.
If the cake is removed before its internal structure has adequately set, there is nothing strong enough to support all that beautiful expansion.
A chiffon cake therefore needs to be thoroughly baked—not simply browned on top.
Cooling the Chiffon Cake
Traditional chiffon cakes are inverted immediately after baking and allowed to cool upside down.
The reason is structural.
When the cake first leaves the oven, its structure is set but still hot, soft, and relatively fragile. Gravity can pull the tall cake downward while it cools.
Inverting the pan allows the cake to remain stretched to its full height while the structure cools and firms.
This is another reason the sides of the pan are not greased—the cake needs to remain attached to the pan while it is inverted.
Handle the cakes carefully while they are warm. Chiffon has a delicate structure until completely cooled.
Let the cakes cool upside down just until you are able to handle the pans with your bare hands. Do not let the cakes cook to room temp before removing them from the pans.
Run an offset spatula around the edge of the pan and slam the cake pan onto the work surface to release the cake. Remove the pan and you will have a perfectly styled Chiffon Cake layers.
Why the Chiffon Method Works
The easiest way to understand chiffon cake is to think about the jobs performed by its major components.
The oil and egg yolks provide richness, moisture, tenderness, and flavor.
The egg-white foam provides aeration.
The flour and egg proteins provide structure.
The liquid provides moisture and eventually contributes steam during baking.
The baking powder, when included, provides additional chemical leavening.
And the aluminum pan provides the surface the batter can grip as it rises.
A successful chiffon cake is therefore a balancing act between:
Tenderness + Aeration + Structure
Too little aeration and the cake becomes dense.
Destroy the foam and the cake loses volume.
Fail to adequately bake and set the structure and the cake may rise beautifully—only to collapse afterward.
The Chiffon Method at a Glance
Remember the sequence:
1. Prepare the pans.
2. Combine the dry ingredients.
3. Combine the egg yolks, oil, liquid, and flavorings separately.
4. Add the yolk-and-oil mixture to the dry ingredients.
5. Mix until the complete flour-based batter is smooth.
6. Separately whip the egg whites.
7. Add the acid and gradually add the sugar.
8. Whip to a glossy, flexible medium-firm to firm foam.
9. Use approximately ¼ to ⅓ of the foam to lighten the base batter.
10. Gently fold in the remaining foam.
11. Immediately transfer to an ungreased aluminum tube pan or aluminum layer cake pans.
12. Bake until the cake's internal structure is completely set.
13. Cool appropriately for the pan and application being used.
The most important sequencing rule is simple:
THE FLOUR-BASED BATTER IS COMPLETELY FINISHED BEFORE THE EGG-WHITE FOAM IS FOLDED INTO IT.
Once the foam enters the batter, our job changes from mixing to preserving.
Chiffon Cake Troubleshooting Guide
My chiffon cake didn't rise very much.
Several things can cause poor volume.
The egg whites may have been under whipped, or the foam may have lost too much air during folding. The whites can also be overwhipped, making them difficult to incorporate without excessive folding.
Check your baking powder measurement as well, if the formula contains it.
Finally, consider the pan. Heavily greased or nonstick sides can prevent chiffon batter from gripping the pan properly as it rises.
My chiffon cake rose beautifully and then collapsed.
This is one of the classic chiffon problems.
The first suspect should be underbaking.
The air, steam, and chemical leavener successfully expanded the cake, but the proteins and starches did not have enough time to create a structure strong enough to hold that expansion.
In other words:
The cake successfully inflated, but its framework wasn't strong enough to stay inflated.
Give the cake adequate baking time and make sure the center is fully set before removing it from the oven.
My egg whites won't whip.
Look for fat contamination.
Even a small amount of egg yolk, oil, butter, or grease on the bowl or whisk can interfere with foam development.
Start with a completely clean, grease-free bowl and whisk and carefully separate the eggs.
My meringue looks dry and chunky.
The egg whites have probably been overwhipped.
A properly prepared chiffon meringue should remain smooth, glossy, moist, and flexible.
Stop whipping before the foam becomes dry, cottony, or clumpy.
My meringue doesn't have much volume.
The sugar may have been introduced too early or too quickly.
Allow the egg whites to begin developing a foam before gradually adding the sugar.
Remember that sugar stabilizes a developed foam, but it can slow foam formation.
I have white streaks throughout my cake.
The meringue was not completely incorporated.
Gentle folding does not mean incomplete folding.
Make sure the spatula reaches all the way to the bottom and sides of the bowl. Continue folding until no visible white streaks remain.
My cake has large holes or tunnels.
Look first at the folding process.
Pockets of unmixed meringue can produce large irregular holes. Overwhipped whites can also remain in stubborn clumps that are difficult to incorporate.
Large air pockets left in the batter during panning may also contribute.
Aim for a fine, flexible foam and fold until the batter is completely homogeneous.
I have a dense or rubbery layer at the bottom.
This often points to a loss of foam or incomplete incorporation.
The batter may have been overmixed after the foam was added, the meringue may not have been completely incorporated, or the finished batter may have sat too long before baking.
Fold efficiently, pan promptly, and get the cake into the oven.
My chiffon cake is tough.
Consider how the base batter was mixed.
The flour needs to be completely hydrated and the batter smooth, but prolonged or aggressive mixing can encourage excessive gluten development.
Mix the flour, yolk, oil, and liquid batter until smooth and homogeneous, then stop.
My cake is gummy or wet inside.
The most likely explanation is underbaking.
The starches and proteins have not completely set.
Remember that exterior color alone doesn't tell you whether the internal structure is finished.
My cake is dry.
Consider overbaking first.
Also check the accuracy of the flour, oil, and liquid measurements. Because chiffon relies on oil and liquid for its characteristic moisture, weighing ingredients accurately is important.
My cake shrank dramatically after baking.
Some contraction during cooling is normal.
Dramatic shrinkage, however, can indicate an underbaked cake or a structure that was not sufficiently developed before the cake left the oven.
With a traditional tube-pan chiffon, also make sure the cake was inverted promptly.
My chiffon cake tore when I removed it from the pan.
It may have been released before it had completely cooled, or the release tool may have cut too deeply into the delicate crumb.
Allow the cake to cool properly and work carefully around the edges when releasing it.
The top of my chiffon cake cracked.
Some cracking is perfectly normal in chiffon cake because the batter expands dramatically.
If the cracking is excessive, however, check the oven temperature. An oven running too hot can cause the exterior to set before the interior has finished expanding.
A Simple Way to Diagnose Almost Any Chiffon Cake Failure
When something goes wrong, ask these questions.
Did I create enough air?
Was the bowl grease-free?
Were the whites properly whipped?
Was the sugar introduced correctly?
Did I create a smooth, glossy, flexible foam?
Did I preserve the air?
Was the flour-based batter completely finished before the foam was introduced?
Did I use some of the foam to lighten the base batter first?
Did I fold rather than stir?
Did I stop folding once the batter was homogeneous?
Did I properly set the structure?
Was the cake baked long enough for the egg proteins to coagulate and the starches to gelatinize?
Was it handled and cooled appropriately for the type of pan being used?
Those questions describe the entire science of the chiffon method:
CREATE THE AIR → PRESERVE THE AIR → SET THE STRUCTURE
Once you understand those three principles, chiffon cake becomes far less mysterious—and much easier to troubleshoot.
HAPPY BAKING FROM THE CABOODLE KITCHEN!